
How to Make Metal Signs for Personalized Home Decor
Choosing the perfect personalized metal sign feels like shaping a piece of your own story for your home or a special occasion. Whether you’re celebrating an American wedding or marking an anniversary, the right tools, materials, and techniques make all the difference. By focusing on proper preparation and understanding popular metals like steel, aluminum, and copper, you create decor that lasts and gifts that truly stand out. Discover how careful planning leads to beautiful, meaningful results.
Table of Contents
- Step 1: Prepare Your Tools And Materials
- Step 2: Design Your Personalized Metal Sign
- Step 3: Cut And Finish The Metal Base
- Step 4: Apply Personalization And Details
- Step 5: Inspect And Mount Your Finished Sign
Quick Summary
| Key Point | Explanation |
|---|---|
| 1. Gather Essential Tools and Materials | Ensure you have proper safety gear, cutting tools, and workspace organization before starting your metal sign project. |
| 2. Design with Purpose | Sketch your sign layout, considering size, typography, and details to create a cohesive design that fits your space. |
| 3. Cut Metal with Precision | Transfer your design accurately onto the metal and select appropriate cutting techniques to achieve clean edges and shapes. |
| 4. Personalize Thoughtfully | Choose personalization methods that reflect your style and ensure that your details are clear and meaningful. |
| 5. Properly Inspect and Mount | Carefully check your finished sign for imperfections and securely mount it using appropriate hardware for longevity and safety. |
Step 1: Prepare your tools and materials
Before you start cutting, shaping, or personalizing your metal sign, gathering the right tools and materials makes the entire process smoother and safer. Think of this step as laying your foundation—getting it right now prevents frustration later.
Start by identifying what type of metal you’ll work with. Steel, aluminum, and copper are the most popular choices for personalized home decor signs, each with unique properties that affect how you’ll handle them. Understanding metal properties helps you choose the right tools and techniques for your specific project.
Here is a comparison of popular metals used for custom signs:
| Metal Type | Visual Appeal | Durability | Ease of Personalization |
|---|---|---|---|
| Steel | Industrial, modern | Very high, rusts if untreated | Easy with power tools |
| Aluminum | Sleek, contemporary | Excellent, rust-resistant | Cuts and shapes easily |
| Copper | Warm, classic finish | Good, develops patina | Accepts etching and paint |
Here’s what you need to gather:
- Safety equipment: Work gloves, safety glasses, and a dust mask protect you from sharp edges and metal particles
- Cutting tools: A metal saw, angle grinder, or tin snips depending on your metal thickness
- Measuring and marking supplies: A ruler, measuring tape, marker, and compass for layout accuracy
- Shaping tools: Files, hammers, and a work bench for bending or flattening edges
- Finishing supplies: Sandpaper or wire brushes to smooth surfaces and prepare for personalization
Invest in quality safety gear first—it’s the one expense that truly pays for itself by keeping you injury-free.
Once you’ve gathered everything, organize your workspace. A clear, well-lit work area reduces mistakes and makes your project enjoyable. Keep sharp tools separate from finished pieces, and have your personalization materials (paint, stencils, or engraving equipment) easily accessible.
Check that all power tools are in working condition and that blades or bits are sharp. Dull tools require more force, which increases the risk of slipping or causing injury. Essential hand and power tools vary based on your design complexity, so review your sign sketch before committing to purchases.
Make sure your metal is clean and free of rust or debris. Wipe it down with a cloth, and use a wire brush if necessary. This simple step improves how your personalization adheres and gives your finished sign a professional appearance.
Pro tip: Label or tape your tools with your initials and organize them in a pegboard or toolbox before starting—you’ll spend less time searching and more time creating.
Step 2: Design your personalized metal sign
With your tools and materials ready, it’s time to translate your vision into an actual design. This step shapes the entire look and feel of your finished piece, so taking time here pays off significantly.
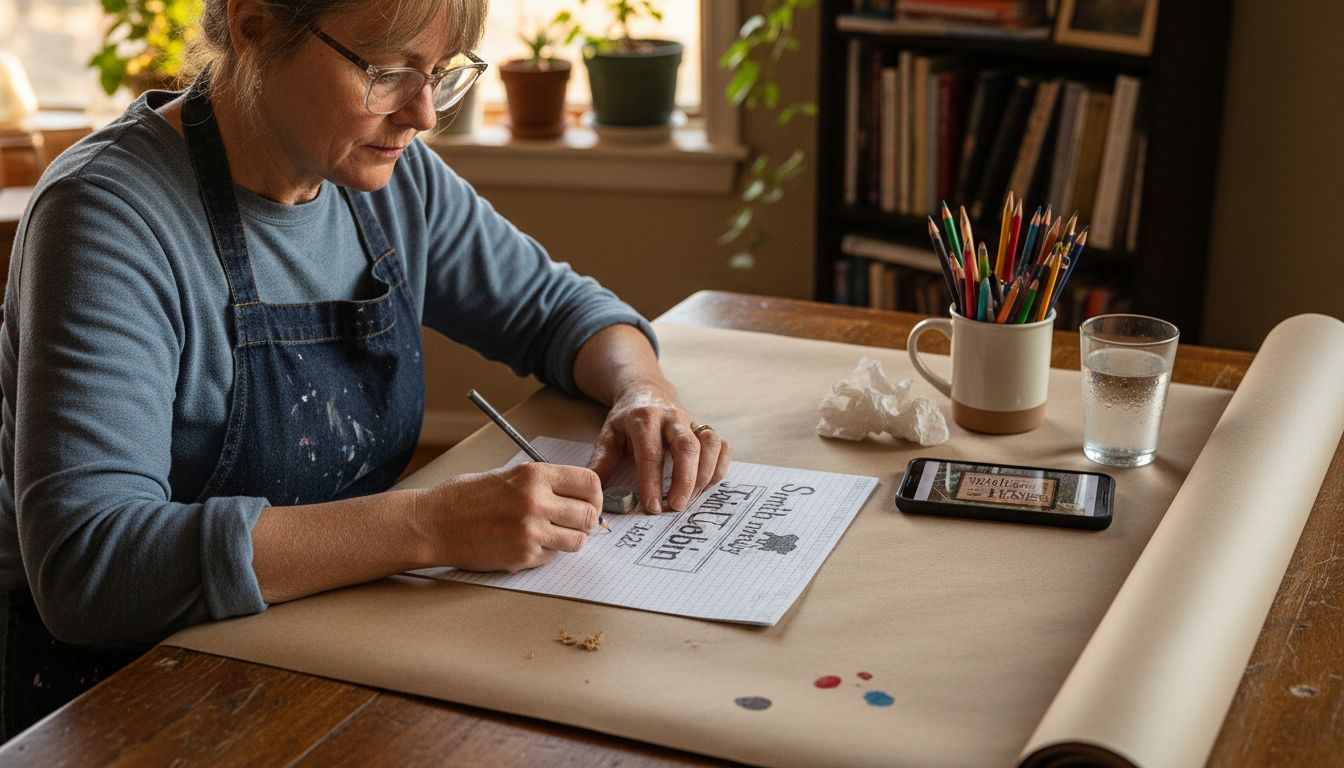
Start by sketching your sign layout on paper. Think about the central message or image you want to highlight—a name, date, meaningful phrase, or decorative element. Consider how your sign will fit into the room where it’ll hang. A small bedroom accent needs a different design approach than a statement piece for an entryway.
Size and placement matter more than you might think. Design considerations like sign size affect how your message reads from different distances and angles. Sketch your design at actual scale if possible, so you can visualize it accurately.
Decide on your design elements:
- Typography: Choose a font style that matches your home’s aesthetic (modern, vintage, elegant)
- Layout: Plan how text and images will balance across the metal surface
- Artistic details: Borders, flourishes, or decorative patterns that complement the main message
- Color scheme: If painting or etching, select colors that coordinate with your décor
Your design should reflect your home’s personality—it’s not just decoration, it’s a reflection of your story.
Think about the artistic techniques you’ll use to personalize the sign. Metalworking techniques range from hand-etching and engraving to paint and patina effects. Each technique creates different visual textures and finishes. Hand-painted signs feel warm and personal, while etched designs offer bold, lasting contrast.
Test your design by drawing it full-size on cardboard or kraft paper. Hold it in your chosen location and live with it for a day. Does the size feel right? Is the text readable? Does it complement your space? These questions matter before you start cutting or marking your metal.
If you’re creating a sign as a gift for someone special like an anniversary or wedding, incorporate meaningful details that tell their story. Personal touches transform a simple sign into a treasured keepsake that captures a moment in time.
Pro tip: Use grid paper or digital design software to transfer your sketch accurately onto the metal—this ensures your design maintains proper proportions when you scale it up.
Step 3: Cut and finish the metal base
Now comes the moment where your metal transforms from raw material into the foundation of your sign. Cutting and finishing are where precision matters most, and the effort you invest here determines whether your final piece looks homemade or professional.
Begin by transferring your design onto the metal surface using a marker or chalk. Mark all your cutting lines clearly so you can see exactly where your saw or grinder will travel. Double-check your measurements against your sketch before making the first cut.
Choose your cutting method based on metal type and thickness. Sheet metal cutting techniques include shearing for straight edges, angle grinders for curves, and tin snips for intricate shapes. Thicker metals need more powerful tools, while thin aluminum responds well to basic hand tools.
Follow these cutting steps:
- Secure your metal firmly to the work bench using clamps or a vise
- Wear safety glasses and work gloves throughout the process
- Cut slowly and steadily, letting the tool do the work rather than forcing it
- Make multiple shallow passes for curves rather than one aggressive cut
- Allow metal to cool if it becomes hot during cutting
After cutting, your edges will be sharp and rough. Deburring removes these dangerous edges and prepares the surface for personalization. Use a file or sandpaper to smooth all edges with steady, even strokes.
Sharp edges aren’t just uncomfortable—they’ll snag fabric and hands. Take time to smooth every single edge.
Finishing the surface properly protects your sign from rust and weather. Metal finishing processes include grinding, polishing, and applying protective coatings. For outdoor signs, consider a clear sealant or rust-preventative paint.
Sand the entire surface with progressively finer grits of sandpaper. Start with 80-grit for rough spots, move to 120-grit for general smoothing, and finish with 220-grit for a polished appearance. This creates an ideal surface for paint, stain, or etching.
Wipe away all dust with a damp cloth and let the metal dry completely. If applying a protective coating, do so in a well-ventilated area according to product instructions.
Pro tip: Keep a damp sponge nearby while cutting and filing—metal dust is slippery and a quick wipe prevents accidents while keeping your workspace clear.
Step 4: Apply personalization and details
This is where your metal sign truly becomes uniquely yours. Adding personalization transforms a blank piece of metal into a meaningful keepsake that tells your story and reflects your home’s character.
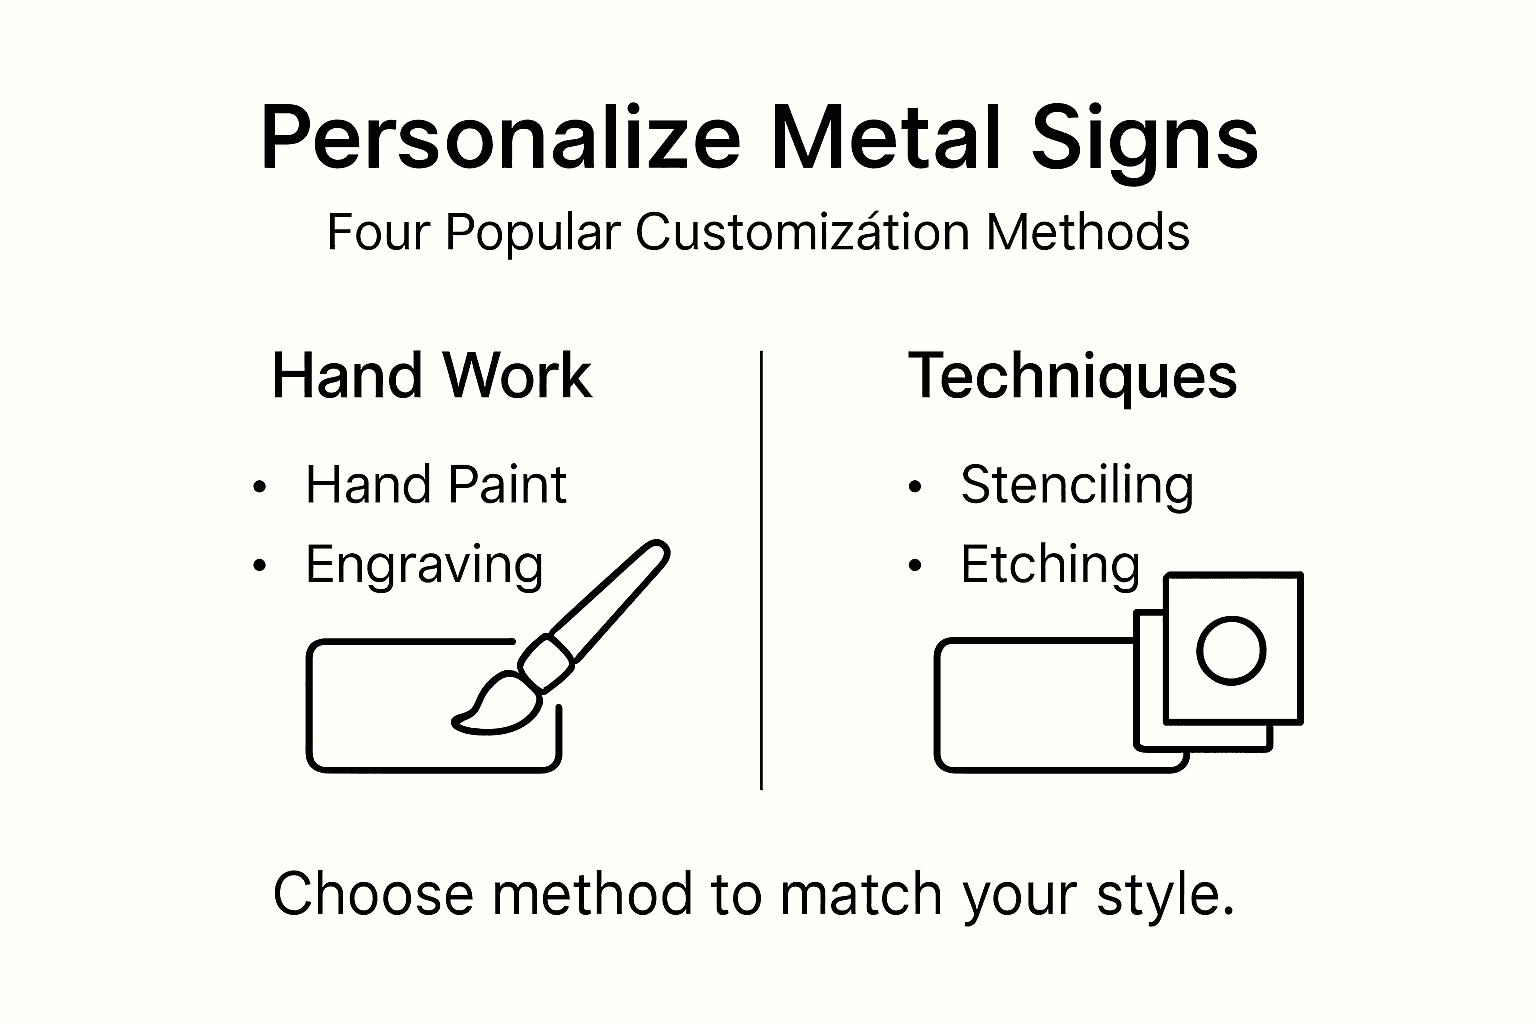
Start by deciding which personalization method works best for your design. Hand-painting gives warmth and artistic flair. Engraving creates permanent, elegant details. Etching produces dramatic contrasts. Stenciling ensures crisp, clean lettering. Each technique offers different aesthetics and durability.
Below is a summary of key personalization techniques and their effects:
| Technique | Appearance Impact | Durability |
|---|---|---|
| Hand-painting | Bold colors, artistic | Moderate, may fade |
| Engraving | Precise, permanent | Very high, never fades |
| Etching | Deep contrast, textured | High, weather-resistant |
| Stenciling | Clean, uniform text | Good, depends on paint |
If you’re hand-painting, begin with a base coat that matches your design vision. Allow it to dry completely between coats. Apply thin, even layers rather than one thick coat to prevent dripping and ensure even coverage.
Enameling and decorative techniques allow you to add vibrant colors and intricate details that make your sign stand out. These methods create durable, long-lasting personalization that resists fading and weathering.
For lettering and graphics, follow these steps:
- Position your stencil or transfer firmly against the metal surface
- Secure it with tape or clamps to prevent shifting
- Apply paint, stain, or etch solution carefully within the boundaries
- Work slowly and deliberately for clean, professional results
- Allow adequate drying time before removing the stencil
Add meaningful details that make the sign special. Names and dates tell your story. Decorative elements like flourishes, borders, or small icons add visual interest and personalization.
The small details are what transform a sign into a cherished memory. Don’t rush them.
If adding text, ensure text clarity and legibility so your message reads clearly from a distance. Choose font sizes and styles that match your overall design aesthetic. Test your work frequently by stepping back to see how it looks from different angles.
For outdoor signs, seal personalization details with a clear protective coating. This preserves your artwork, prevents fading, and shields it from moisture and weather damage.
Let all personalization fully cure before hanging your sign. Check the specific drying times for whatever paint, stain, or sealant you’ve used.
Pro tip: Keep paper towels and rubbing alcohol nearby while personalizing—catching mistakes immediately is much easier than trying to fix them later.
Step 5: Inspect and mount your finished sign
You’ve invested time and care into creating your personalized metal sign. Now it’s time to inspect your work and display it properly so it looks beautiful and stays secure for years to come.
Begin by examining every inch of your sign carefully. Check that all personalization is complete and matches your design. Look for any drips, smudges, or imperfections in paint or finishes. Verify that all edges are smooth and safe to touch.
Inspect the sign for structural integrity. Sign inspection and durability require checking that the metal is flat without warping or bending. Hold it up to natural light and examine it from multiple angles. If you spot any issues, now is the time to fix them before mounting.
Make sure all sealant and protective coatings have fully cured according to product instructions. This typically takes 24 to 48 hours depending on what you used.
Before mounting, gather the proper hardware:
- Mounting brackets rated for your sign’s weight
- Anchors or fasteners appropriate for your wall type
- A level to ensure straight installation
- A drill or screwdriver for securing hardware
- A stud finder if mounting on drywall
Choose your mounting location carefully. Consider how your sign fits with surrounding décor, natural lighting, and viewing distance. A sign meant to be read from across the room needs a different height than one viewed up close.
Proper mounting techniques ensure your sign stays secure and level. If mounting on drywall, locate wall studs for maximum stability. Use appropriate anchors rated for your sign’s weight if studs aren’t available.
A crooked sign catches the eye for all the wrong reasons. Take the extra minute to get it level.
Follow these mounting steps:
- Mark bracket positions lightly in pencil
- Use a level to verify marks are perfectly horizontal
- Drill pilot holes to prevent cracking or slipping
- Install brackets according to hardware instructions
- Hang your sign and double-check that it’s level and secure
- Erase any pencil marks from the wall
Test the installation by gently pushing on your sign. It should not move, wiggle, or shift. Give everything one final visual inspection to confirm your personalized metal sign looks exactly as you imagined.
Pro tip: Take a photo of your finished sign before hanging it—this documents your work and gives you a record of your creation to share with friends and family.
Bring Your Personalized Metal Sign Ideas to Life with FunLifeNow
Crafting a custom metal sign can feel challenging when you face sharp edges, precision cuts, and perfect personalization. The article highlights the importance of careful design, safe tools, and flawless finishing to make a sign that tells your unique story and fits your home perfectly. If you want to skip the tricky parts or need inspiration for meaningful, durable home decor that connects emotionally with your space, you are in the right place.
Explore our collection of expertly crafted personalized metal signs and other custom home accents at FunLifeNow. Every item reflects American-made quality, thoughtfully designed with your names, dates, and messages to create lasting keepsakes. Discover how easy it is to choose from a variety of styles, customize your message, and receive a finished product that exudes warmth and character. Don’t wait to make your home truly yours or give a heartfelt gift that speaks volumes. Start your personalization journey today at FunLifeNow and turn your vision into reality.
Frequently Asked Questions
What tools do I need to make a personalized metal sign?
To make a personalized metal sign, you need safety equipment, cutting tools, measuring supplies, shaping tools, and finishing supplies. Gather items like work gloves, a metal saw, a ruler, and sandpaper to ensure a smooth creation process.
How can I design my personalized metal sign effectively?
Start by sketching your layout on paper, focusing on the central message and artistic elements. Test your design by drawing it full-size on cardboard or paper, holding it in the intended location to confirm size and readability before transferring it to the metal.
What cutting techniques should I use based on the metal type?
Choose your cutting technique based on the metal’s thickness and type: for thin aluminum, use tin snips or shears; for thicker steel, use an angle grinder or metal saw. Secure the metal and cut slowly to ensure precision and avoid accidents.
How do I apply personalization to my metal sign?
Select the best technique for personalization, such as hand-painting, engraving, or stenciling, depending on your desired style. Ensure your design is secure, and work carefully within the boundaries to achieve clean and crisp results.
What should I check before mounting my finished metal sign?
Inspect every inch for imperfections, ensuring all personalization is complete and edges are smooth. Confirm that your sign is structurally sound and that the protective coatings have cured fully before proceeding to mount it.
How can I ensure my mounted sign is level and secure?
Use a level to mark bracket positions lightly on the wall, then drill pilot holes for secure installation. Confirm that your sign hangs straight and does not move or shift when gently pushed; if it does, make adjustments as needed.
Recommended
- How to Display Metal Signs for Personalized Home Decor – FunLifeNow
- How to Display Metal Signs for Personalized Home Decor – FunLifeNow
- Metal Signs Decor: Elevating Personalized Home Style – FunLifeNow
- Metal Signs Decor: Elevating Personalized Home Style – FunLifeNow
- Create Beautiful DIY Nature Ornaments for Kids’ Gifts – The Zoofamily