
How to Hang Canvas Art: A Step-by-Step Guide
Finding that empty spot on your wall seems easy enough and yet it is just the start of turning any room into your personal gallery. Plenty of folks hang art too high or let it fade in direct sunlight, ignoring the details that make a space truly pop. But the real surprise is this: measuring from the floor to the center of your art at 57 to 60 inches can make the difference between a piece that vanishes and one that commands attention. This one quick guideline changes everything about how your wall art feels in your home.
Table of Contents
- Step 1: Choose The Ideal Location For Your Art
- Step 2: Gather Necessary Tools And Materials
- Step 3: Measure And Mark For Accurate Placement
- Step 4: Prepare The Canvas For Hanging
- Step 5: Securely Hang The Canvas On The Wall
- Step 6: Verify Alignment And Make Adjustments
Quick Summary
| Key Point | Explanation |
|---|---|
| 1. Choose a focal point in the room | Survey your space for areas that draw attention and complement your decor for optimal art placement. |
| 2. Hang artwork at eye level | Position the center of your art 57 to 60 inches from the floor for comfortable viewing by most people. |
| 3. Use proper mounting tools and techniques | Select appropriate mounting hardware based on the canvas weight to ensure secure hanging and prevent damage. |
| 4. Measure and mark carefully | Accurately measure dimensions and use painter’s tape to visualize placement before making permanent marks on the wall. |
| 5. Perform final alignment checks | After hanging, step back to ensure proper alignment and make minor adjustments for visual harmony in the space. |
Step 1: Choose the Ideal Location for Your Art
Selecting the perfect location for your canvas art is more than just finding an empty wall space. This critical first step sets the foundation for transforming your living area into a personalized visual narrative that reflects your style and enhances your home’s aesthetic appeal.
Begin by surveying your room with a critical eye. Look for wall spaces that naturally draw attention and complement your existing decor. Consider traffic flow, furniture placement, and lighting conditions. Natural light can dramatically enhance artwork, but direct sunlight might cause fading, so aim for spaces with soft, indirect illumination.
Measure your wall carefully before hanging. Pay attention to surrounding furniture and architectural features. You want your canvas to feel integrated into the space, not like an afterthought. A general rule of thumb is to hang artwork at eye level - typically around 57 to 60 inches from the floor to the center of the piece. This height creates a comfortable viewing experience for most people.
For rooms with unique layouts or multiple walls, experiment with visual balance. In living rooms, consider hanging art above sofas or console tables. Bedroom walls benefit from pieces that create a calming focal point near the bed. If you’re unsure about placement, check out our comprehensive wall art size guide for more detailed recommendations.
Remember that negative space matters as much as the artwork itself. Do not overcrowd walls or place pieces too close together. Give each canvas room to breathe and make its own statement. When in doubt, use painter’s tape to outline your artwork’s potential placement. This technique allows you to visualize the final look before making any permanent mounting decisions.
By thoughtfully selecting your canvas art’s location, you create more than just wall decor. You’re crafting an intentional space that tells your unique story, one carefully positioned piece at a time.
The following table provides a step-by-step overview of the canvas art hanging process, including each step’s main focus and its expected outcome for easy reference.
| Step | Focus | Key Outcome |
|---|---|---|
| Choose the Location | Assess room and wall areas | Select ideal spot for the canvas |
| Gather Tools and Materials | Prepare all necessary equipment | Ensure smooth, safe installation |
| Measure and Mark | Take precise measurements and marking | Accurate and balanced placement |
| Prepare the Canvas | Check/install hanging hardware | Canvas ready for mounting with secure supports |
| Hang the Canvas | Attach canvas to wall at marked spots | Canvas securely and level on the wall |
| Verify and Adjust | Check alignment and overall presentation | Professional, visually harmonious finished result |
Step 2: Gather Necessary Tools and Materials
Preparing for canvas art installation requires more than just enthusiasm. Strategic tool preparation ensures a smooth, professional hanging process that protects both your artwork and your walls. Before drilling or hammering, collect a comprehensive toolkit that will transform your artistic vision into reality.
Start with measurement tools. A laser level is invaluable for ensuring precise horizontal alignment, eliminating the frustration of slightly crooked artwork. Pair this with a standard tape measure to calculate exact wall placement. Pencils are crucial for marking mounting points - choose ones with soft lead that won’t damage walls and can be easily erased if needed.
For mounting hardware, the weight of your canvas determines your approach. Lightweight canvases under 10 pounds typically require standard picture hanging hooks or adhesive mounting strips. Heavier pieces demand more robust solutions like wall anchors, toggle bolts, or specialized mounting brackets. Our wall art sizing guide can help you determine the appropriate hanging method based on your specific artwork.
Your essential tool collection should include:
- Drill with assorted drill bit sizes
- Hammer
- Stud finder
- Pencil
- Tape measure
- Laser or traditional spirit level
- Screwdriver set
- Wall anchors (multiple sizes)
- Protective work gloves
Consider the surface you’re working with. Drywall requires different techniques compared to plaster or brick surfaces. A stud finder becomes critical when hanging heavier canvases, helping you locate secure mounting points behind the wall surface. Invest in wall anchors rated for your canvas weight to prevent potential accidents.
Protective gear matters too. Wear safety glasses when drilling and work gloves to prevent potential injuries. A drop cloth can protect flooring from dust and potential scratches. Take your time selecting and preparing tools - careful preparation prevents potential damage to both your walls and your cherished artwork.
Below is a comprehensive table summarizing the essential tools and materials needed for hanging canvas art, along with their primary purposes to help you prepare efficiently.
| Tool/Material | Purpose |
|---|---|
| Laser level | Ensures perfect horizontal alignment during hanging |
| Tape measure | Measures wall and canvas dimensions for accurate placement |
| Pencil (soft lead) | Marks mounting points without damaging or staining walls |
| Drill (with bits) | Prepares holes for anchors or screws on various wall types |
| Hammer | Secures picture hooks or light anchors into the wall |
| Stud finder | Locates wall studs to provide strong mounting support |
| Screwdriver set | Tightens or installs mounting hardware and wall anchors |
| Wall anchors | Provides extra support on drywall or plaster for heavier canvases |
| Protective gloves | Protects hands during installation |
| Safety glasses | Shields eyes while drilling or hammering |
With your toolkit assembled, you’re ready to move forward confidently, transforming your carefully selected wall space into a personalized gallery that reflects your unique aesthetic.
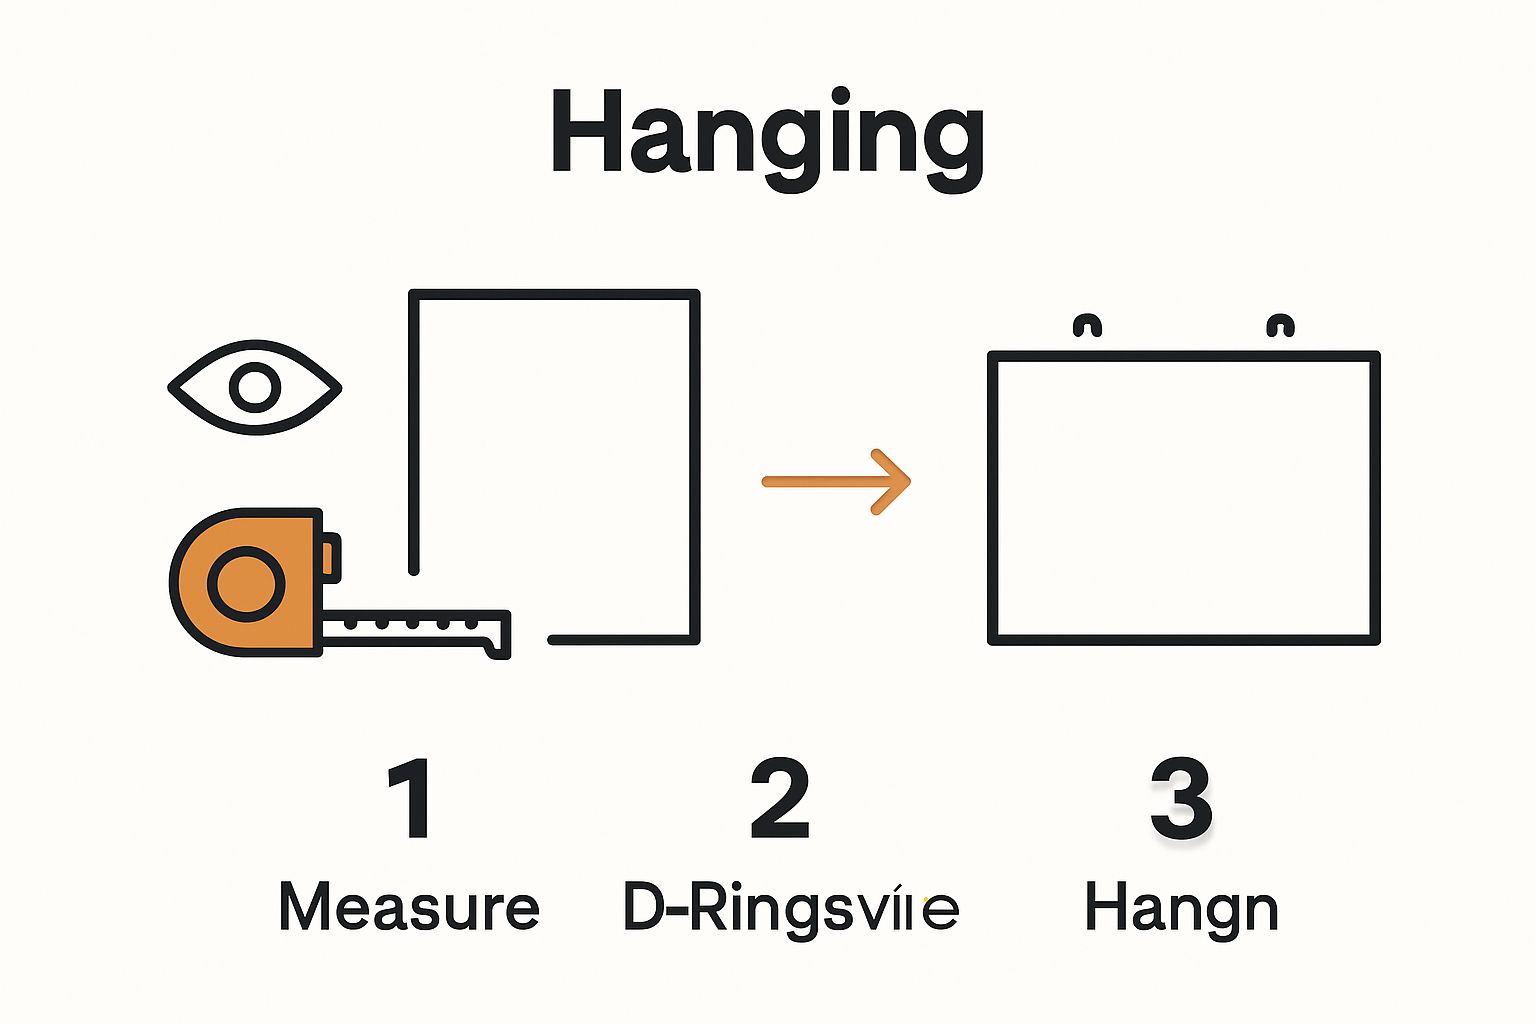
Step 3: Measure and Mark for Accurate Placement
Precision is the key to transforming your wall from blank canvas to curated art display. Measuring and marking accurately ensures your canvas looks intentional, balanced, and professionally positioned. This step requires patience, attention to detail, and a systematic approach that will prevent costly mistakes.
Begin by understanding your artwork’s specific dimensions. Measure the exact width and height of your canvas, including any frame or mounting hardware. These measurements will guide your placement strategy. Position your laser level or traditional spirit level horizontally at your predetermined eye-level height - typically 57 to 60 inches from the floor to the center of the artwork.
If hanging multiple canvases, create a visual template first. Use painter’s tape to outline potential arrangements, allowing you to experiment without leaving permanent marks. This technique helps you visualize spacing, alignment, and overall composition before committing to drilling or hammering. According to the Smithsonian Institution’s conservation experts, careful preliminary marking prevents potential damage to walls and artwork.
When marking mounting points, use a sharp pencil and make light, easily erasable marks. For single canvas installations, measure and mark the hanging point directly at the center top of the frame. If using wire mounting, measure slightly lower to account for the wire’s arc when suspended. Always double-check measurements before creating any permanent marks.
Special considerations apply for different wall surfaces. Drywall requires careful stud location to ensure secure mounting. Use a stud finder to identify solid mounting points, which provide maximum support for heavier canvases. For plaster or concrete walls, specialized anchors might be necessary to create stable mounting points.
Verify your markings by stepping back and visually confirming alignment. Use your level to ensure horizontal precision, and measure multiple times from floor and adjacent walls to guarantee symmetry. A small mistake in initial marking can result in a noticeably off-center or tilted artwork that disrupts the entire room’s aesthetic.
With careful measurement and strategic marking complete, you’re now prepared to transform your wall into a personalized gallery that reflects your unique style and artistic vision.
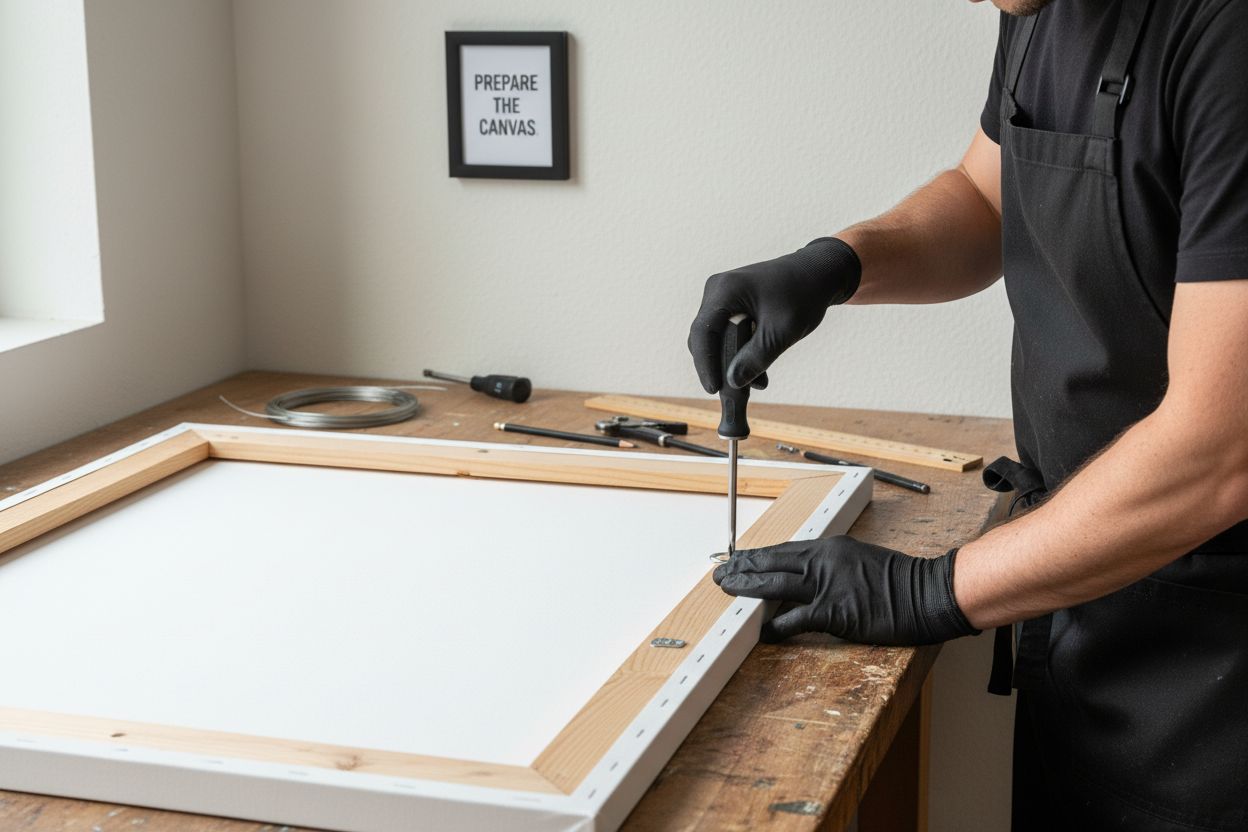
Step 4: Prepare the Canvas for Hanging
Preparing your canvas for hanging is a critical step that determines both the artwork’s aesthetic appeal and its long-term stability. This process involves careful examination of your canvas’s mounting hardware and ensuring it can support the piece’s weight securely and elegantly.
Examine the back of your canvas thoroughly. Most canvases come with pre-installed mounting hardware, but not all are created equal. Look for sturdy D-rings, wire, or sawtooth hangers that match the artwork’s weight and dimensions. According to the Smithsonian Institution’s conservation experts, proper hardware installation is crucial for preventing potential damage or accidents.
For canvases without built-in hardware, you’ll need to install mounting elements. D-rings provide the most stable hanging method. Position them approximately one-third of the way down from the top of the frame on each side. This placement distributes weight evenly and prevents tilting. Use a ruler and pencil to mark exact mounting points, ensuring symmetrical placement.
When working with wire hanging, select a wire rated for at least three times the canvas weight. Thread the wire through D-rings, leaving enough slack to create a gentle arc when suspended. Twist wire ends securely and use cable crimps to prevent unraveling. Test the wire’s strength by gently pulling to ensure it can support the canvas without stretching or breaking.
If you’re looking to explore more personalized wall decor options, consider the unique characteristics of your specific canvas. Custom or handmade pieces might require specialized mounting techniques. Some artworks benefit from additional reinforcement, especially if they’re large or feature complex frames.
Weight distribution is paramount. Heavier canvases might need additional support beyond standard hanging hardware. Consider consulting a professional framer for pieces over 20 pounds or with unusual mounting requirements. Always handle your canvas with clean hands or wear cotton gloves to prevent oil transfer or accidental damage during the preparation process.
Before final installation, do a preliminary hang test.
 Temporarily place the canvas on your prepared wall marks, checking for balance and alignment. Gently adjust wire tension or hardware positioning if the piece doesn’t hang perfectly straight. This careful preparation ensures your artwork will look stunning and remain secure for years to come.
Step 5: Securely Hang the Canvas on the Wall
The moment of truth has arrived. Hanging your canvas is both an art and a science, requiring steady hands, precision, and a calm approach. This final installation step transforms your carefully prepared artwork from a potential masterpiece to an actual focal point of your living space.
If you’re exploring different wall decor options, remember that each piece requires individual attention. Begin by positioning yourself directly in front of the pre-marked wall points. Hold the canvas at the top edge, allowing the hanging wire or hardware to align with the installed wall hooks or mounting points. Maintain a firm but gentle grip, ensuring you don’t accidentally scratch the wall or damage the canvas frame.
According to the Smithsonian Institution’s conservation experts, carefully lift and position the canvas onto the installed hooks, making certain the hardware securely catches the mounting points. Slowly release your grip, watching how the artwork settles. A perfectly hung canvas will sit level and appear to float effortlessly against the wall.
Utilize your spirit level for final adjustments. Even a slight tilt can disrupt the entire room’s visual harmony. Gently tap one side of the frame or adjust the wire tension if you notice any misalignment. Some canvases might require minor repositioning to achieve that perfect, gallery-worthy placement.
Special considerations apply for different wall types. Plaster walls demand extra caution to prevent cracking, while drywall requires careful weight distribution. For heavier canvases, consider adding a second mounting point for increased stability. If you’re unsure about the wall’s load-bearing capacity, consult a professional or use additional support brackets.
Once hung, step back and evaluate from multiple angles. View the canvas from different areas of the room, checking its relationship to furniture, lighting, and surrounding decor. A well-placed canvas should feel like a natural extension of your space, not an awkward addition. Make final micro-adjustments to ensure the piece looks intentional and harmonious.
Congratulations. You’ve successfully transformed a blank wall into a personalized art display that reflects your unique style and aesthetic sensibility.
Step 6: Verify Alignment and Make Adjustments
The final verification stage transforms your canvas hanging from a technical process to an artistic presentation. Precision matters more than perfection, and this step ensures your artwork becomes a seamless part of your living space’s visual narrative.
Begin by creating distance. Step back several feet and observe your canvas from multiple angles. The artwork should feel balanced and intentional, not like an afterthought hastily mounted on the wall. Use your spirit level to confirm horizontal alignment, checking both the top edge of the frame and the hanging wire’s tension.
Learn more about stylish wall decor placement techniques to refine your approach. Lighting plays a crucial role in artwork presentation. Natural and artificial light can dramatically impact how your canvas appears. Move around the room, observing how light interacts with the canvas surface, revealing texture, color depth, and potential shadows.
Make incremental adjustments with patience. Slight movements can dramatically improve visual harmony. Gently shift the canvas a fraction of an inch left or right, up or down. Use your fingertips to nudge the frame, maintaining a light touch to avoid wall damage. If wire-mounted, adjust the wire’s tension to correct minor tilting.
Consider the canvas’s relationship to surrounding elements. How does it interact with furniture, architectural features, and other decorative pieces? Negative space is as important as the artwork itself. Your canvas should breathe within its environment, creating visual interest without overwhelming the room.
Utilize these verification criteria:
- The canvas sits perfectly horizontal
- No visible gaps between the frame and wall
- Artwork appears centered in its intended space
- Lighting enhances the canvas’s visual appeal
- The piece complements surrounding decor
If persistent alignment issues occur, do not force the installation. Remove the canvas, inspect your original marking points, and potentially re-drill mounting hardware. Sometimes a fresh approach yields better results. Patience during this final stage ensures a professional, gallery-worthy presentation that reflects your personal style and artistic vision.
Make Wall Art That Truly Reflects Your Story
You have mastered the art of hanging canvas pieces with precision and care, turning an empty space into a vibrant part of your home. But many find that, after all the effort, something still feels missing. The canvas may be perfectly level and centered, yet it might not truly capture the heart of your story or the unique memories you want to share.

Why settle for ordinary wall decor when you can personalize every detail? At FunLifeNow, you can design custom-made canvas art that highlights names, special dates, or cherished messages. Each piece is crafted with the quality and emotion discussed in your guide, making every wall a conversation starter. Discover how easy it is to create art with meaning. Start your journey with FunLifeNow and redesign your space with pieces that are made just for you. Looking for more tips or inspiration? Visit our homepage to explore customer favorites and get started today.
Frequently Asked Questions
How do I choose the ideal location for my canvas art?
Selecting the right location involves surveying your room for wall spaces that complement your decor and enhance the room’s aesthetic. Aim for areas with soft, indirect lighting and hang your artwork at eye level, typically around 57 to 60 inches from the floor.
What tools do I need to hang canvas art securely?
Essential tools include a laser level for precise alignment, a tape measure for accurate placement, and mounting hardware suited to your canvas’s weight. Gather a drill, hammer, stud finder, and protective gear such as safety glasses to ensure a smooth installation process.
How do I accurately measure and mark for canvas art placement?
Begin by measuring the dimensions of your canvas and then use a level to mark where to hang it, ideally at eye level. For multiple pieces, use painter’s tape to outline arrangements on the wall, allowing you to check alignment before making any permanent marks.
What preparation steps should I take before hanging my canvas?
Inspect your canvas hardware to ensure it can support its weight, and install D-rings or wire if needed. Position D-rings about one-third down from the top of the frame for balanced weight distribution, ensuring your canvas hangs securely and beautifully.
How can I ensure my canvas art hangs straight?
After placing your canvas on the wall, use a spirit level to double-check its alignment. Adjust the canvas gently as needed, often just a small nudge can make a difference in achieving a professional, level presentation.
What adjustments should I make after hanging my canvas art?
Step back to observe the artwork from multiple angles, checking for balance and alignment with surrounding decor. Make small adjustments as necessary, focusing on factors like horizontal alignment and relationship with nearby furniture to ensure a cohesive look.