Creating a Gallery Wall: Step-by-Step Guide for Personal Touch
Did you know that over 60 percent of people say wall art is the first thing they notice in a home? The way you display your favorite artwork and photos can instantly shape the mood and personality of any room. By curating a gallery wall that reflects what matters to you, you can turn even the plainest wall into a lively conversation starter and a source of daily inspiration.
Quick Summary
| Key Point | Explanation |
|---|---|
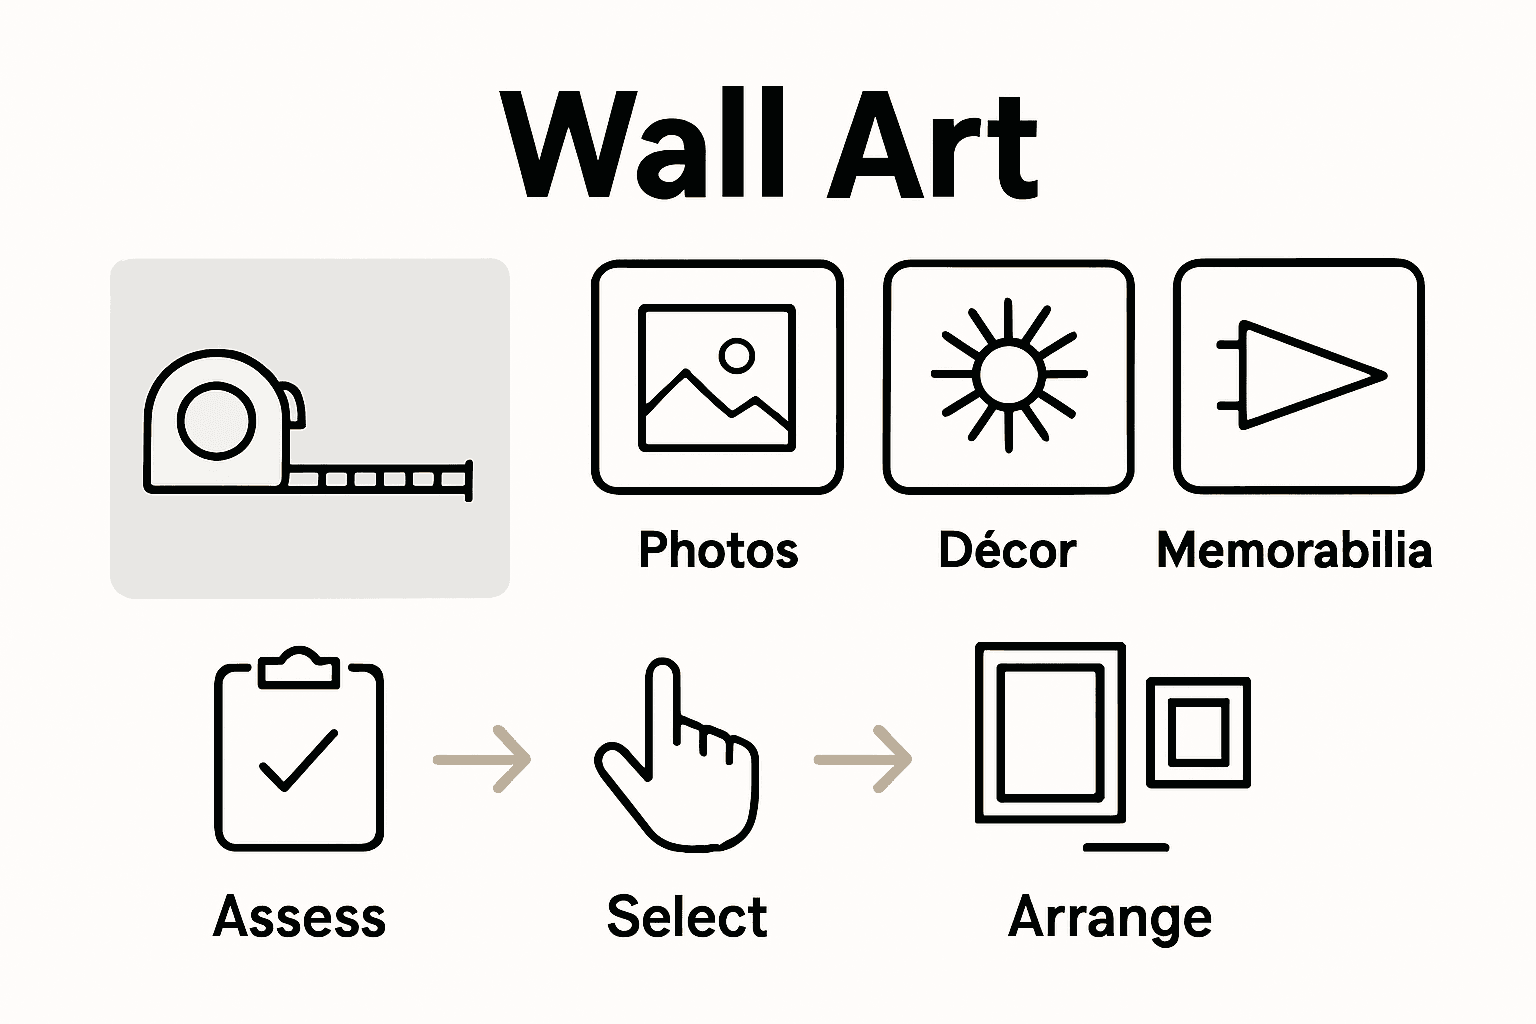
| 1. Assess wall space carefully | Measure your wall to ensure the gallery covers two-thirds of the space for balance. |
| 2. Select meaningful and personal pieces | Choose items that evoke emotions, like family photos or travel mementos, for a unique narrative. |
| 3. Plan your layout on the floor | Experiment with arrangements on the floor first to visualize before hanging to avoid mistakes. |
| 4. Use templates for precise hanging | Create paper templates of each piece to mark nail locations and maintain even spacing during installation. |
| 5. Step back and adjust frequently | Regularly assess spacing and leveling as you hang each piece to ensure a polished final display. |
Table of Contents
- Step 1: Assess Your Space And Gather Inspiration
- Step 2: Select Personalized Art And Meaningful Decor
- Step 3: Plan Your Gallery Wall Layout And Arrangement
- Step 4: Prepare Artwork And Tools For Hanging
- Step 5: Install, Adjust, And Verify Your Gallery Wall
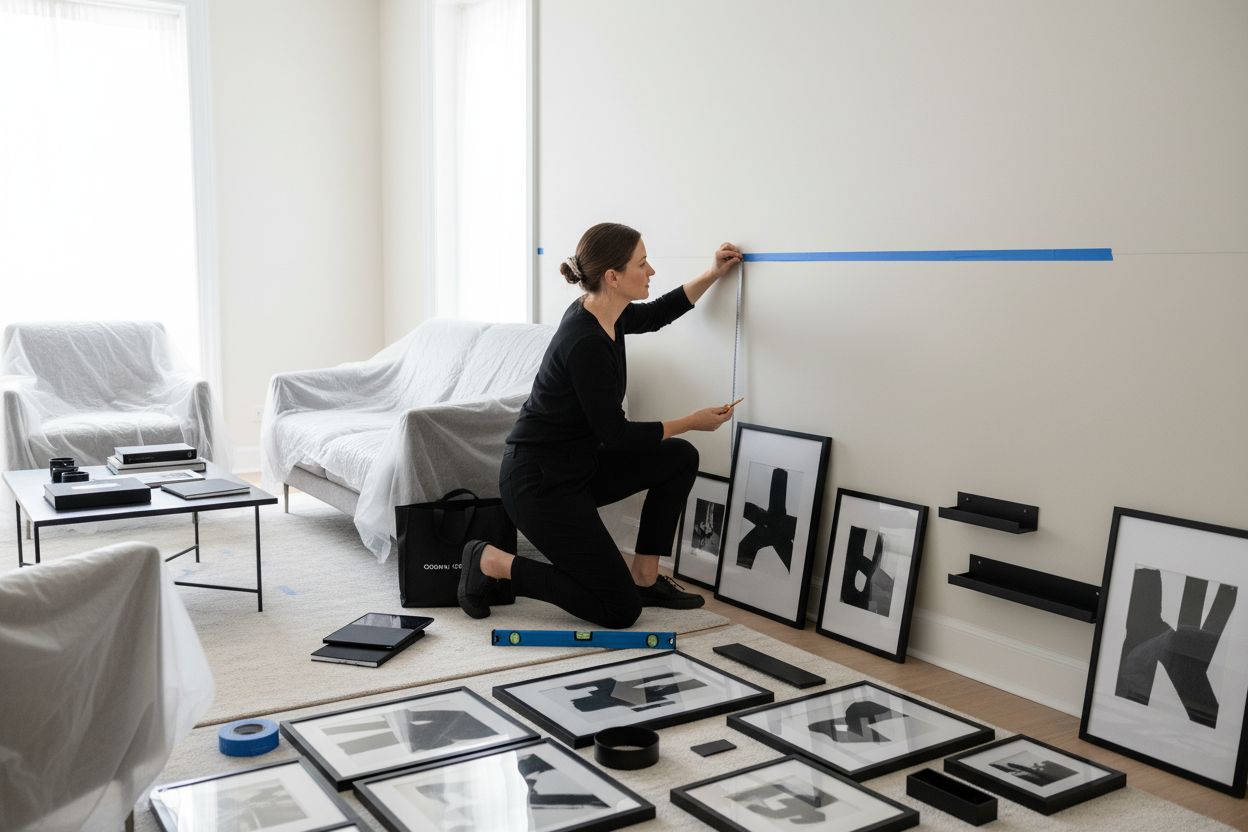
Step 1: Assess Your Space and Gather Inspiration
Creating a gallery wall starts with understanding your space and collecting pieces that reflect your unique style. Think of this step as curating a visual story that will transform a blank wall into a personal showcase.
Begin by taking a good look at your available wall space. According to wall art sizing experts, your gallery wall should ideally cover about two-thirds of the wall or match the width of furniture placed beneath it. This proportion ensures visual balance and prevents your display from looking awkward or cramped.
Start gathering inspiration by collecting artwork and decor pieces that speak to you. These might include family photographs, vintage prints, mirrors, sketches, or even three-dimensional objects like small shelves or decorative plates. The key is creating a collection that feels cohesive yet personal. Pro tip: lay out your potential pieces on the floor first to experiment with different arrangements without putting unnecessary holes in your wall.
Consider the overall aesthetic you want to achieve. Are you drawn to a minimalist look with black and white photography? Or perhaps a more eclectic mix of colors and textures? Your gallery wall should reflect your personality and complement your existing room decor.
Pro tip: Take a photo of your potential layout on the floor. This digital snapshot will help you visualize the final design and make adjustments before you start hanging anything.
Ready to bring your gallery wall to life? Your next step is planning the perfect layout that will showcase your carefully curated collection.
Step 2: Select Personalized Art and Meaningful Decor
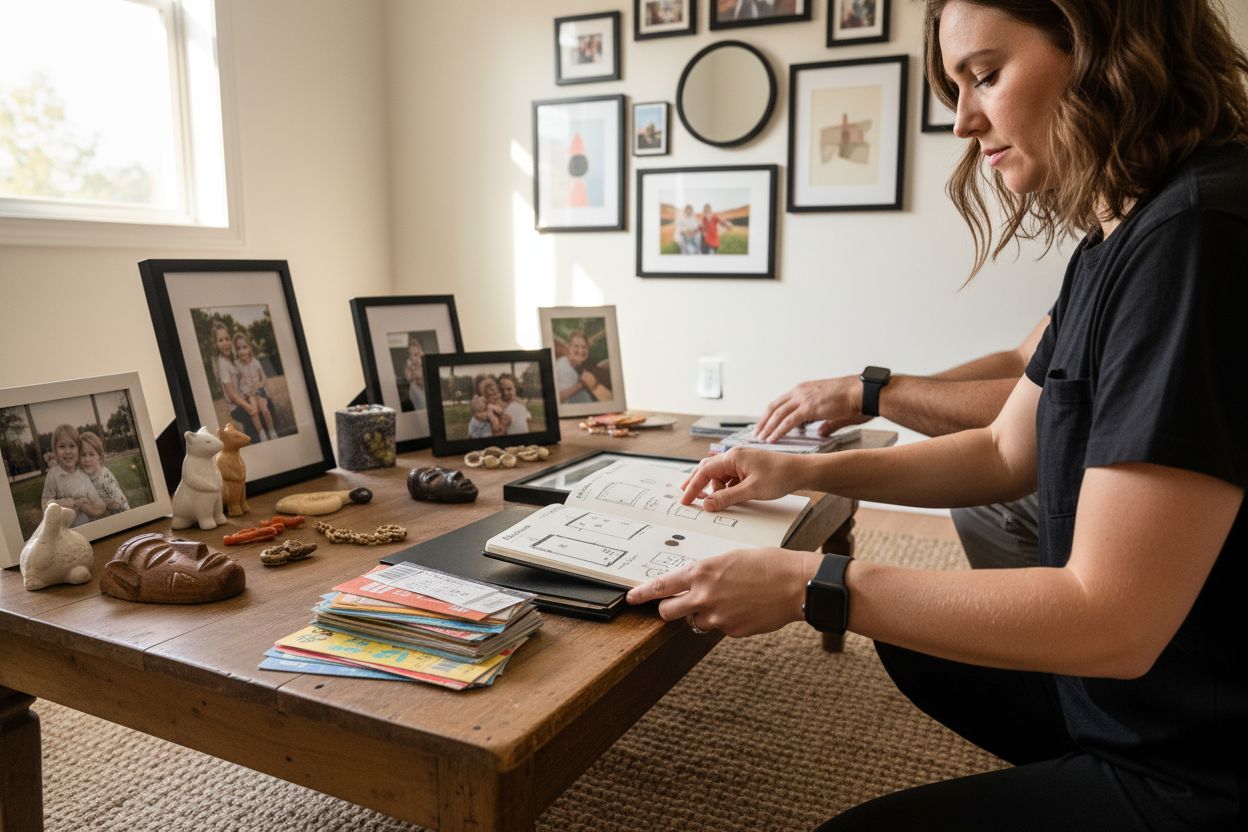
Now comes the exciting part of creating a gallery wall that truly tells your story through thoughtfully selected artwork and decor. Personalized home decor experts emphasize that meaningful pieces transform a simple wall display into a personal narrative.
Start by gathering items that spark genuine emotion and connection. Family photographs capturing milestone moments work wonderfully. Perhaps you have travel souvenirs, vintage postcards from memorable trips, or artwork collected during special adventures. These pieces carry memories that make your gallery wall uniquely yours.
According to design research, selecting a connecting theme helps create visual harmony. This could mean choosing pieces with similar color palettes, matching frame styles, or a consistent subject matter like landscapes, black and white portraits, or abstract art.
 The goal is creating a curated collection that feels intentional yet deeply personal.
Dont limit yourself to traditional artwork. Consider incorporating three dimensional elements like small metal signs, wooden plaques, decorative mirrors, or even cherished mementos that add depth and texture to your display. A concert ticket from an unforgettable show or a pressed flower from a significant moment can become a meaningful focal point.
Pro tip: Mix different sizes and orientations to create visual interest. Combine larger statement pieces with smaller complementary items to create a dynamic and engaging gallery wall that draws the eye and tells your story.
With your meaningful pieces selected, you are now ready to plan the perfect arrangement that will bring your personal gallery wall to life.
Here’s a comparison of key elements to consider when selecting artwork and decor for your gallery wall:
| Element Type | Examples | Purpose |
|---|---|---|
| Photographs | Family events Travel moments |
Personal connection Storytelling |
| Art Prints | Vintage posters Abstract art |
Visual interest Theme cohesion |
| 3D Objects | Mirrors Small shelves Decorative plates |
Depth & texture Unique appeal |
| Memorabilia | Concert tickets Pressed flowers |
Sentimental value Conversation pieces |
Step 3: Plan Your Gallery Wall Layout and Arrangement
With your meaningful pieces gathered, it is time to transform them into a stunning visual composition. Wall art arrangement experts recommend creating a layout that tells your story with intention and balance.
Start by clearing a large floor space where you can experiment freely. Lay out all your selected pieces and begin playing with different arrangements. According to design research, the secret is to start with a focal point piece that will anchor your entire gallery wall. This could be a larger photograph, a significant artwork, or something with special meaning that naturally draws the eye.
Spacing is crucial for creating a polished look. Design professionals suggest maintaining about 2 to 3 inches between smaller pieces and 3 to 4 inches between larger items. This prevents your gallery wall from feeling cluttered while ensuring each piece has room to breathe and be appreciated.
A pro tip for achieving professional looking results is to create paper templates of each piece. Trace your artwork onto kraft paper or newspaper, cut out the shapes, and then tape these templates onto the wall. This lets you visualize the final arrangement without making unnecessary holes. Most design experts recommend centering your gallery wall around 57 to 60 inches from the floor—which corresponds to average eye level.
Dont be afraid to play and experiment. Your first layout might not be perfect, and that is totally okay. Take a step back, snap a photo, and review your arrangement.
Sometimes seeing it through a camera lens helps you spot areas that need adjustment.
With your layout planned, you are now ready to bring your gallery wall to life and transform your space into a personal masterpiece.
Step 4: Prepare Artwork and Tools for Hanging
Before you transform your wall into a stunning gallery, you will need to gather the right tools and prepare your artwork for flawless installation. Canvas hanging experts recommend a systematic approach to ensure professional results.
First, collect your essential toolkit. You will want a measuring tape, level, masking tape, pencil, eraser, hammer, and appropriate hanging hardware. Consider the weight of your pieces and select wall anchors or picture hooks that can safely support each item. Lighter frames might work with adhesive hooks, while heavier artwork will require more robust mounting solutions.
Take time to prepare your wall surface. Fill any existing holes, smooth out imperfections, and ensure the area is clean and dry. This background preparation prevents unexpected complications during your gallery wall installation.
For each piece, create a paper template by tracing the frame outline onto kraft paper or newspaper. Cut out these templates precisely and use masking tape to temporarily position them on the wall. This trick allows you to experiment with placement without making unnecessary holes. Pro tip: Use a small dab of toothpaste on the template’s hanging point to mark exact nail locations a technique that makes transferring your layout remarkably simple.
Double check everything with a level. Precision matters when creating a gallery wall that looks intentional and professional. Take your time measuring and aligning each template, ensuring your final display will be straight and visually balanced.
With your artwork and tools prepared, you are now ready to bring your gallery wall vision to life.
Step 5: Install, Adjust, and Verify Your Gallery Wall
With your templates in place, the exciting moment of transformation has arrived. Wall decor experts recommend a methodical approach to bringing your gallery wall to life with precision and care.
Start by installing your focal piece first. This anchor artwork will serve as the visual centerpiece from which all other pieces will be positioned. Use the nail or hook locations you marked earlier with the paper templates, ensuring each piece is securely mounted. For heavier items, consider using wall anchors that can support the weight without risking damage to your wall.
As you hang each piece, step back frequently to assess the overall composition. Check that spacing remains consistent and the visual balance you planned is maintained. Some pieces might need minor adjustments to achieve that perfect gallery wall look. Do not be afraid to rehang an item if it does not feel quite right.
Pro tip: Use a laser level or traditional bubble level to verify that each piece is perfectly straight. Even slight variations can disrupt the clean, intentional appearance of your gallery wall. A small adjustment can make a significant difference in the final presentation.
Once all pieces are hung, take time to view your gallery wall from different angles and distances. Natural light can reveal subtle alignment issues, so consider checking your arrangement at different times of day. Some artworks might need slight repositioning to look their absolute best.
Congratulations your personalized gallery wall is now complete and ready to tell your unique story.
Bring Your Gallery Wall Vision to Life with Personalized Art
You have learned how to plan and arrange a gallery wall that feels truly personal. The biggest challenge? Finding unique, meaningful pieces that capture your story and make your home feel like you. It is not always easy to locate artwork and decor that connect emotionally or feature the details that matter most to you. Sometimes, off-the-shelf decor falls short in delivering that sense of warmth and custom storytelling your space deserves. For a gallery wall that celebrates your memories, relationships, and milestones, personalized decor makes all the difference.
Explore Personalized Canvas Wall Art Prints for handcrafted, American-made pieces that can be tailored with names, dates, places, or heartfelt messages. At FunLifeNow, you will discover endless ways to turn your collection into a truly one-of-a-kind display.

It is time to create a gallery wall that is as meaningful as it is beautiful. Visit FunLifeNow to start customizing your wall art today. Searching for standout accents? Browse our Personalized Directional Sign Canvas Prints to add a playful or sentimental touch to your arrangement. Your wall tells your story make it unforgettable now.
Frequently Asked Questions
How do I assess my wall space for a gallery wall?
To assess your wall space, measure the width and height of your wall, keeping in mind that your gallery wall should cover about two-thirds of the space or match the width of any furniture below it. Visualize the area by marking with painter’s tape the dimensions of your planned layout before committing to holes in the wall.
What types of artwork and decor should I include on my gallery wall?
Include pieces that evoke emotion and reflect your unique story, such as family photographs, travel souvenirs, or art collected over time. Aim for a mix of styles and mediums, incorporating 3D elements like mirrors or small shelves for added depth and personal touch.
What’s the best way to plan the layout for my gallery wall?
Begin by laying out all selected pieces on the floor to experiment with arrangements and establish a focal point. Leave 2-4 inches of space between pieces to maintain balance, adjusting placements as needed before installing any artwork on the wall.
How can I ensure my artwork is hung straight and level?
Use a measuring tape and level to check the alignment of each piece as you hang them, ensuring precision for a professional appearance. Consider hanging your focal piece first and then arranging surrounding items based on that central piece to maintain consistency and accuracy.
What tools do I need to hang a gallery wall successfully?
Gather essential tools like a measuring tape, level, hammer, and appropriate hanging hardware that matches the weight of your artwork. Prepare your wall by ensuring it’s clean and free from imperfections, setting the stage for a polished final display.
How can I make adjustments after hanging my gallery wall art?
After hanging, step back and assess the overall composition; minor repositioning of items may be necessary for optimal alignment and spacing. Take a photo of your layout for reference, which can help you notice any unevenness or balance issues from different angles.